 | Products |
| Home » Technical Support » ElevateDB Technical Support » Product Manuals » ElevateDB Version 2 SQL Manual » Getting Started » Creating a Client-Server Database |
The following steps will guide you through creating the Tutorial database using the ElevateDB Manager and ElevateDB Server.
 It is assumed that you have already configured and started the ElevateDB Server using the steps outlined in the Starting and Configuring the ElevateDB Server topic.
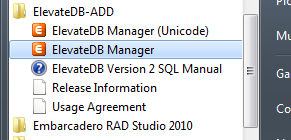
1. Start the ElevateDB Manager (edbmgr.exe) by clicking on the ElevateDB Manager link in the Start menu.
The ElevateDB Manager is installed with the ElevateDB Additional Software and Utilities (EDB-ADD) installation available from the Downloads page of the web site.
2. Make sure that the session is using the correct session type (Remote) and desired character set.
The character set for the session must match the character set being used by the ElevateDB Server being accessed. Using a different character set will result in you not being able to connect to the ElevateDB Server.
a. Select the Default session from the list of available sessions.
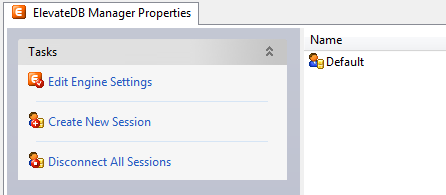
b. In the Tasks pane, click on the Edit Session link.

c. On the General page of the Edit Session dialog, make sure that the Session Type is set to Remote.
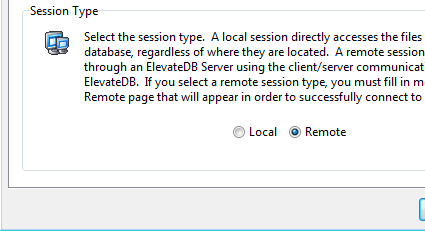
d. On the General page of the Edit Session dialog, make sure that the Character Set is set to the desired value - either ANSI or Unicode.

If you're not sure which character set to select and this is the first time using the ElevateDB Manager, then leave the character set at the default of Unicode.
e. Click on the OK button.
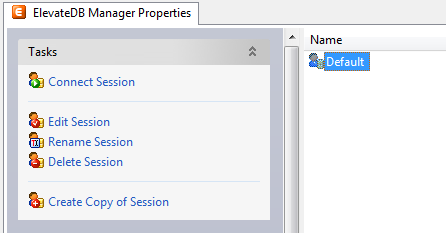
3. Double-click on the Default session in the Properties window in order to connect the session.
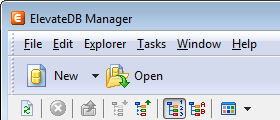
4. Click on the New button on the main toolbar.
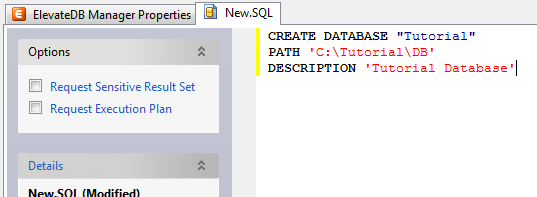
5. Paste in the following CREATE DATABASE SQL statement in the new SQL window:
6. Press the F9 key to execute the SQL statement.
7. Press the F5 key to refresh the explorer contents for the session.
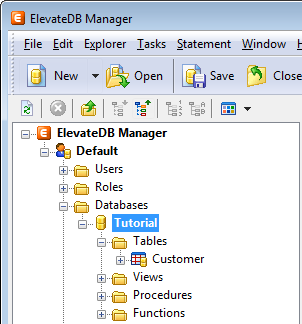
8. Click on the + sign next to the Databases node in the treeview.
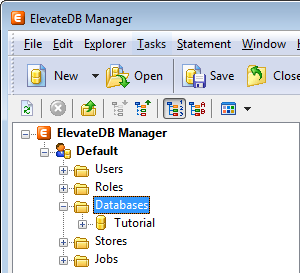
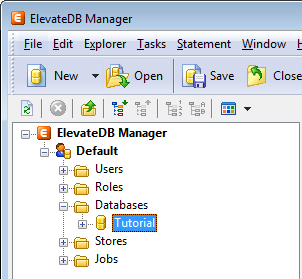
9. Click on the new Tutorial database that you just created.
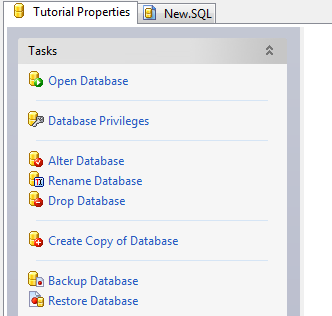
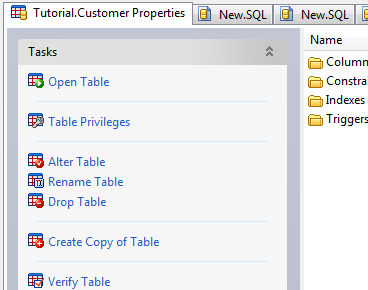
10. Press the F6 key to make the Properties window the active window, and then click on the Open Database link in the Tasks pane.
11. Click on the New.SQL tab to bring forward the SQL window.
12. Paste in the following CREATE TABLE SQL statement. If you are using a Unicode session (see Step 2 above), then you should use the Unicode version of the CREATE TABLE statement. If you are using an ANSI session, then you should use the ANSI version of the CREATE TABLE statement:
ANSI
Unicode
13. Press the F9 key to execute the SQL statement.

14. Press the F5 key to refresh the explorer contents for the session.
15. The table should now show up in the list of tables for the Tutorial
database.
16. Click on the New.SQL tab to bring forward the SQL window.
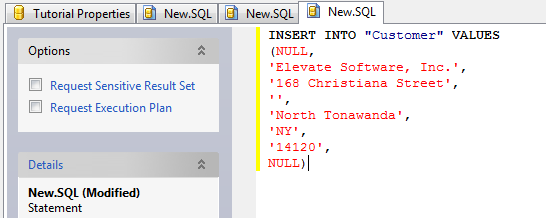
17. Paste in the following INSERT SQL statement:
18. Press the F9 key to execute the SQL statement.
19. Click on the Customer table that you just created.
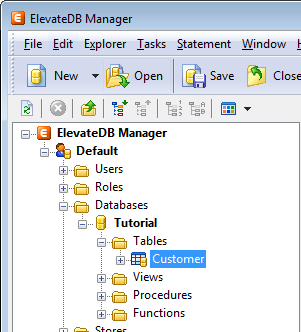
20. Press the F6 key to make the Properties window the active window, and then click on the Open Table link in the Tasks pane.
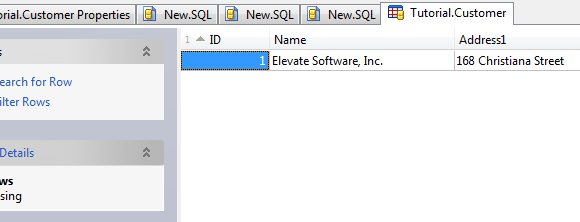
21. You will now see the row that you just inserted.
You have now successfully created the Tutorial database.
1. Start the ElevateDB Manager (edbmgr.exe) by clicking on the ElevateDB Manager link in the Start menu.
2. Make sure that the session is using the correct session type (Remote) and desired character set.
a. Select the Default session from the list of available sessions.
b. In the Tasks pane, click on the Edit Session link.
c. On the General page of the Edit Session dialog, make sure that the Session Type is set to Remote.
d. On the General page of the Edit Session dialog, make sure that the Character Set is set to the desired value - either ANSI or Unicode.
e. Click on the OK button.
3. Double-click on the Default session in the Properties window in order to connect the session.
4. Click on the New button on the main toolbar.
5. Paste in the following CREATE DATABASE SQL statement in the new SQL window:
CREATE DATABASE "Tutorial"
PATH 'C:\Tutorial\DB'
DESCRIPTION 'Tutorial Database'
6. Press the F9 key to execute the SQL statement.
7. Press the F5 key to refresh the explorer contents for the session.
8. Click on the + sign next to the Databases node in the treeview.
9. Click on the new Tutorial database that you just created.
10. Press the F6 key to make the Properties window the active window, and then click on the Open Database link in the Tasks pane.
11. Click on the New.SQL tab to bring forward the SQL window.
12. Paste in the following CREATE TABLE SQL statement. If you are using a Unicode session (see Step 2 above), then you should use the Unicode version of the CREATE TABLE statement. If you are using an ANSI session, then you should use the ANSI version of the CREATE TABLE statement:
ANSI
CREATE TABLE "Customer"
(
"ID" INTEGER GENERATED ALWAYS AS IDENTITY (START WITH 0, INCREMENT BY 1),
"Name" VARCHAR(30) COLLATE "ANSI_CI" NOT NULL,
"Address1" VARCHAR(40) COLLATE "ANSI_CI",
"Address2" VARCHAR(40) COLLATE "ANSI_CI",
"City" VARCHAR(30) COLLATE "ANSI_CI",
"State" CHAR(2) COLLATE "ANSI_CI",
"Zip" CHAR(10) COLLATE "ANSI_CI",
"CreatedOn" TIMESTAMP DEFAULT CURRENT_TIMESTAMP,
CONSTRAINT "ID_PrimaryKey" PRIMARY KEY ("ID")
)
Unicode
CREATE TABLE "Customer"
(
"ID" INTEGER GENERATED ALWAYS AS IDENTITY (START WITH 0, INCREMENT BY 1),
"Name" VARCHAR(30) COLLATE "UNI_CI" NOT NULL,
"Address1" VARCHAR(40) COLLATE "UNI_CI",
"Address2" VARCHAR(40) COLLATE "UNI_CI",
"City" VARCHAR(30) COLLATE "UNI_CI",
"State" CHAR(2) COLLATE "UNI_CI",
"Zip" CHAR(10) COLLATE "UNI_CI",
"CreatedOn" TIMESTAMP DEFAULT CURRENT_TIMESTAMP,
CONSTRAINT "ID_PrimaryKey" PRIMARY KEY ("ID")
)
13. Press the F9 key to execute the SQL statement.
14. Press the F5 key to refresh the explorer contents for the session.
15. The table should now show up in the list of tables for the Tutorial
database.
16. Click on the New.SQL tab to bring forward the SQL window.
17. Paste in the following INSERT SQL statement:
INSERT INTO "Customer" VALUES
(NULL,
'Elevate Software, Inc.',
'168 Christiana Street',
'',
'North Tonawanda',
'NY',
'14120',
NULL)
18. Press the F9 key to execute the SQL statement.
19. Click on the Customer table that you just created.
20. Press the F6 key to make the Properties window the active window, and then click on the Open Table link in the Tasks pane.
21. You will now see the row that you just inserted.
You have now successfully created the Tutorial database.
This web page was last updated on Tuesday, September 16, 2025 at 04:56 PM | Privacy Policy © 2026 Elevate Software, Inc. All Rights Reserved Questions or comments ? |
