 | Products |
| Home » Technical Support » ElevateDB Technical Support » Product Manuals » ElevateDB Version 2 SQL Manual » Getting Started » Migrating a Database |
The following steps will guide you through migrating a database from another format to ElevateDB format using the ElevateDB Manager.
1. The migrator modules provided with ElevateDB are:
You can find these migrator modules as part of the ElevateDB Additional Software and Utilities (EDB-ADD) installation in the \libs subdirectory under the main installation directory. There are ANSI and Unicode versions of each of the migrator modules that will work with both ANSI or Unicode sessions, and the ElevateDB Manager will automatically select the correct migrator modules for the session being used.
 You can download the ElevateDB Additional Software and Utilities (EDB-ADD) installation from the Downloads page of the web site.
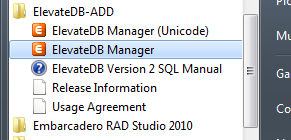
2. Start the ElevateDB Manager (edbmgr.exe) by clicking on the ElevateDB Manager link in the Start menu.
The ElevateDB Manager is installed with the ElevateDB Additional Software and Utilities (EDB-ADD) installation available from the Downloads page of the web site.
3. Make sure that the session is using the desired character set and configuration file folder (C:\Tutorial).
a. Select the Default session from the list of available sessions.
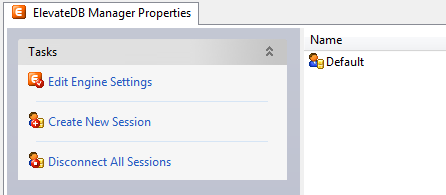
b. In the Tasks pane, click on the Edit Session link.

c. On the General page of the Edit Session dialog, make sure that the Character Set is set to the desired value - either ANSI or Unicode.

If you're not sure which character set to select and this is the first time using the ElevateDB Manager, then leave the character set at the default of Unicode.
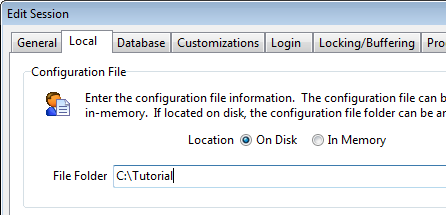
d. On the Local page of the Edit Session dialog, make sure that the Configuration File - File Folder is set to the desired folder.
e. Click on the OK button.
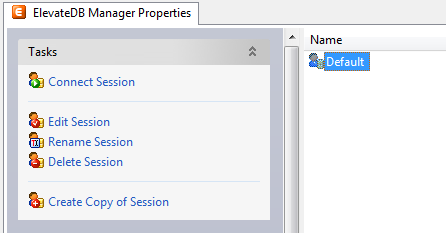
4. Double-click on the Default session in the Properties window in order to connect the session.
5. In the Tasks pane, click on the Create Database Migrators link. This will automatically create all of the database migrators that are shipped with the ElevateDB Manager.
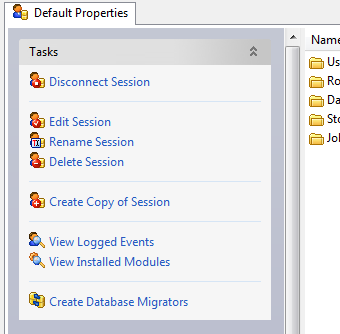
If the character set of the session is changed in the future (Step 3 above), just re-execute this step in the ElevateDB Manager and the database migrators will be updated so that they use the correct migrator modules that match the character set of the session.
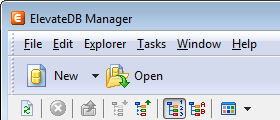
6. Click on the New button on the main toolbar.
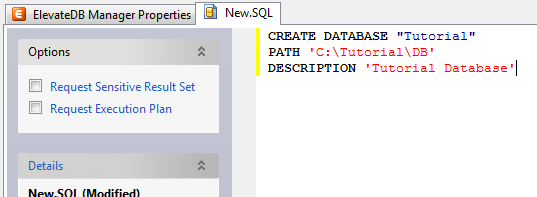
7. Paste in the following CREATE DATABASE SQL statement in the new SQL window:
8. Press the F9 key to execute the SQL statement.
9. Press the F5 key to refresh the explorer contents for the session.
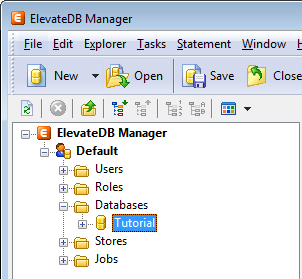
10. Click on the + sign next to the Databases node in the treeview.
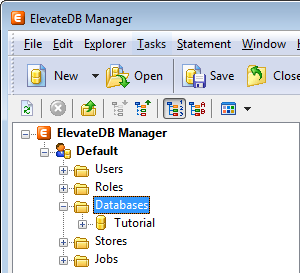
11. Click on the new Tutorial database that you just created.
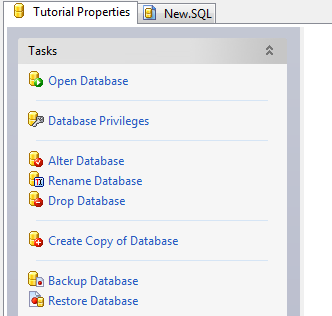
12. Press the F6 key to make the Properties window the active window, and then click on the Open Database link in the Tasks pane.
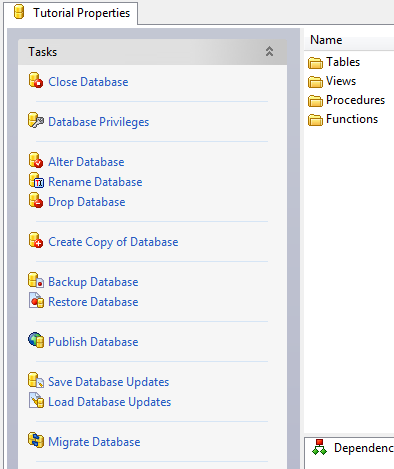
13. Click on the Migrate Database link in the Tasks pane for the database.
14. Select the desired migrator from the list of migrators.
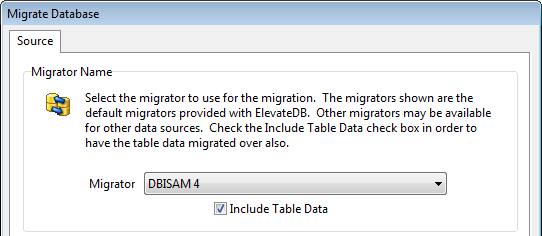
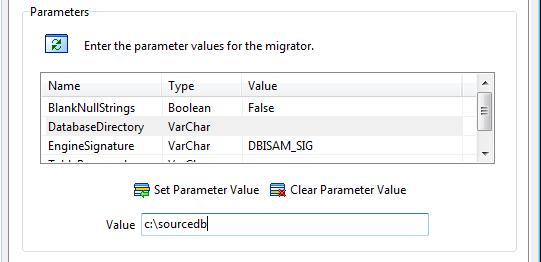
15. Each migrator will have various parameters that control how the migration process executes, and these parameters are expressed in terms that are easily understood. Usually, at a minimum, the source database name or directory parameter will need to be set. To set the source database parameters:
a. Click on the desired parameter in the list of parameters.
b. Type in the parameter value in the parameter edit control, and click on the Set Parameter button.
15. Click on the OK button, and the migration process will begin and progress information will be present in the bottom status bar of the ElevateDB Manager.
You have now successfully migrated your database to ElevateDB.
1. The migrator modules provided with ElevateDB are:
| Module | Description |
| edbmigrate | ElevateDB migrator module |
| edbmigratedbisam1 | DBISAM Version 1.x migrator module |
| edbmigratedbisam2 | DBISAM Version 2.x migrator module |
| edbmigratedbisam3 | DBISAM Version 3.x migrator module |
| edbmigratedbisam4 | DBISAM Version 4.x migrator module |
| edbmigratebde | BDE (Borland Database Engine) migrator module |
| edbmigrateado | ADO (Microsoft ActiveX Data Objects) migrator module |
| edbmigratendb | NexusDB migrator module |
| edbmigrateads | ADS (Advantage Database Server) migrator module |
You can find these migrator modules as part of the ElevateDB Additional Software and Utilities (EDB-ADD) installation in the \libs subdirectory under the main installation directory. There are ANSI and Unicode versions of each of the migrator modules that will work with both ANSI or Unicode sessions, and the ElevateDB Manager will automatically select the correct migrator modules for the session being used.
2. Start the ElevateDB Manager (edbmgr.exe) by clicking on the ElevateDB Manager link in the Start menu.
3. Make sure that the session is using the desired character set and configuration file folder (C:\Tutorial).
a. Select the Default session from the list of available sessions.
b. In the Tasks pane, click on the Edit Session link.
c. On the General page of the Edit Session dialog, make sure that the Character Set is set to the desired value - either ANSI or Unicode.
d. On the Local page of the Edit Session dialog, make sure that the Configuration File - File Folder is set to the desired folder.
e. Click on the OK button.
4. Double-click on the Default session in the Properties window in order to connect the session.
5. In the Tasks pane, click on the Create Database Migrators link. This will automatically create all of the database migrators that are shipped with the ElevateDB Manager.
6. Click on the New button on the main toolbar.
7. Paste in the following CREATE DATABASE SQL statement in the new SQL window:
CREATE DATABASE "Tutorial"
PATH 'C:\Tutorial\DB'
DESCRIPTION 'Tutorial Database'
8. Press the F9 key to execute the SQL statement.
9. Press the F5 key to refresh the explorer contents for the session.
10. Click on the + sign next to the Databases node in the treeview.
11. Click on the new Tutorial database that you just created.
12. Press the F6 key to make the Properties window the active window, and then click on the Open Database link in the Tasks pane.
13. Click on the Migrate Database link in the Tasks pane for the database.
14. Select the desired migrator from the list of migrators.
15. Each migrator will have various parameters that control how the migration process executes, and these parameters are expressed in terms that are easily understood. Usually, at a minimum, the source database name or directory parameter will need to be set. To set the source database parameters:
a. Click on the desired parameter in the list of parameters.
b. Type in the parameter value in the parameter edit control, and click on the Set Parameter button.
15. Click on the OK button, and the migration process will begin and progress information will be present in the bottom status bar of the ElevateDB Manager.
You have now successfully migrated your database to ElevateDB.
This web page was last updated on Tuesday, September 16, 2025 at 04:56 PM | Privacy Policy © 2026 Elevate Software, Inc. All Rights Reserved Questions or comments ? |
