 | Products |
| Home » Technical Support » Elevate Web Builder Technical Support » Product Manuals » Elevate Web Builder 3 Manual » Using the IDE » Creating a New Component |
Use the following steps to create a new component in the IDE:
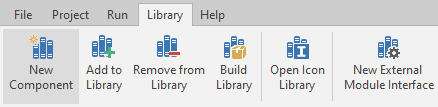
- Click on the Library tab on the main menu.
- Click on the New Component button on the Library menu:
- The New Component dialog will now appear:

- In this dialog, specify the class name of the component that you wish to create in the first edit control. By convention, any class name should be prefixed with a capital "T" (for "Type").
Next, select the applicable component library for the ancestor component class so that you can select the proper ancestor class name.
 If a project is open in the IDE, then the default selected component library will be the component library used by the open project. If a project is not open in the IDE, then the default selected component library will be the last component library used for any operation in the IDE, with the initial component library being the Client component library.
Finally, select the ancestor component class name for the new component. - Click on the OK button.
This web page was last updated on Tuesday, September 16, 2025 at 04:56 PM | Privacy Policy © 2026 Elevate Software, Inc. All Rights Reserved Questions or comments ? |
