 | Products |
| Home » Technical Support » Elevate Web Builder Technical Support » Product Manuals » Elevate Web Builder 3 Modules Manual for RAD Studio XE6 (Delphi Win32) » Getting Started » Creating a Native Server Module |
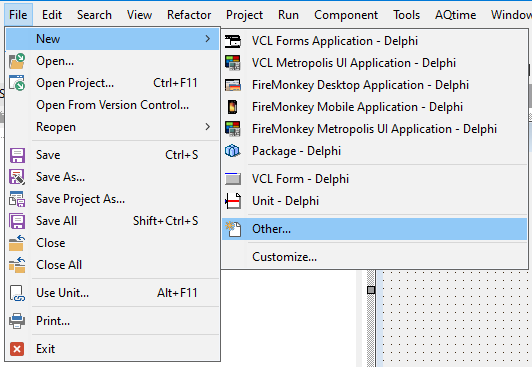
1. In the RAD Studio IDE, select the File/New/Other menu option from the main menu.
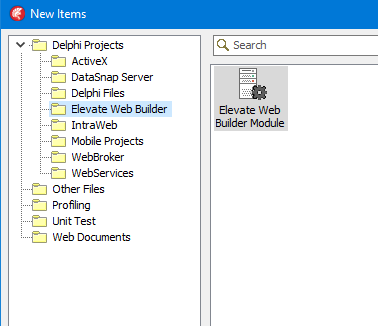
2. The New Items dialog will then appear. Select the Elevate Web Builder option folder from the list on the left-hand side of the dialog. Click on the Elevate Web Builder Module and then click on the OK button.
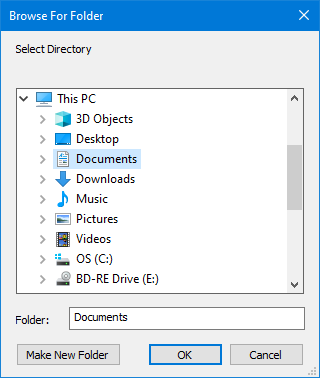
3. The Browse for Folder dialog will then appear. Select the desired target folder for the new module project and click on the OK button.
4. The new module project will be created in the desired target folder and opened as the active project in the RAD Studio IDE.
Please see the Handling Server Requests topic for more information on adding the appropriate code for handling incoming requests to the native server module.
2. The New Items dialog will then appear. Select the Elevate Web Builder option folder from the list on the left-hand side of the dialog. Click on the Elevate Web Builder Module and then click on the OK button.
3. The Browse for Folder dialog will then appear. Select the desired target folder for the new module project and click on the OK button.
4. The new module project will be created in the desired target folder and opened as the active project in the RAD Studio IDE.
Please see the Handling Server Requests topic for more information on adding the appropriate code for handling incoming requests to the native server module.
This web page was last updated on Wednesday, May 28, 2025 at 08:24 AM | Privacy Policy © 2025 Elevate Software, Inc. All Rights Reserved Questions or comments ? |
