 | Products |
| Home » Technical Support » Elevate Web Builder Technical Support » Product Manuals » Elevate Web Builder 3 Manual » Using the IDE » Modifying Project Options |
The project options for a project include:
Use the following steps to modify the project options for a project:
After making any changes, click on the OK button to save the changes, or the Cancel button to discard the changes.
General Options (Visual Client and Server)
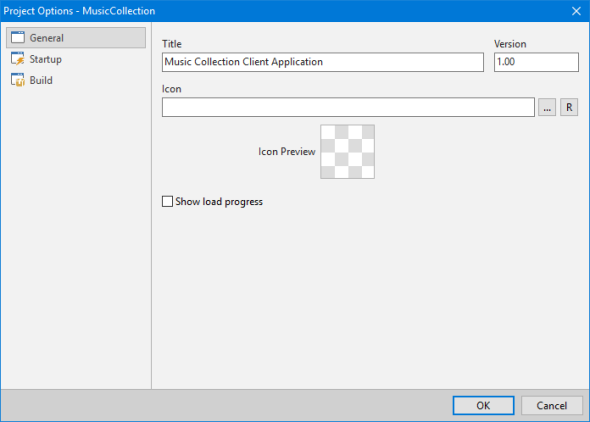
For visual client applications, the General page provides options for specifying the title and version number for the application, the icon to display in the browser window for the application, and whether or not to show load progress.

For non-visual client applications, the General page is not available.
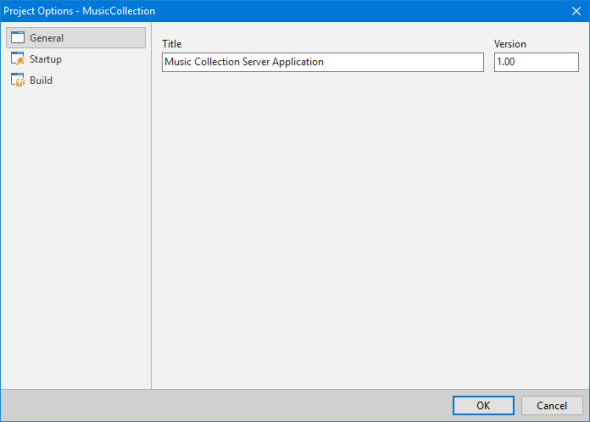
For server applications the General page provides options for specifying the title and version number for the application.
Startup (Visual Client and Server)
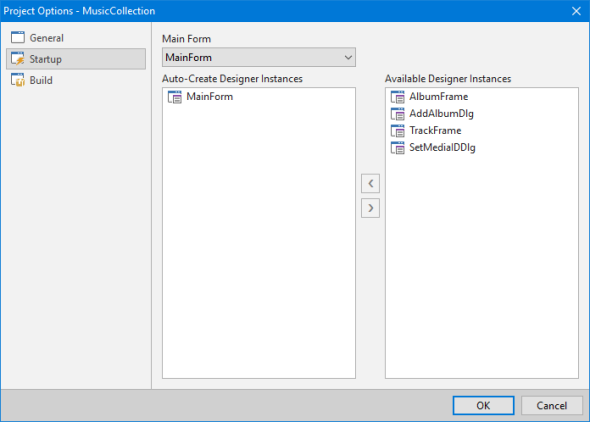
For visual client applications, the Startup page allows you to specify which forms or databases in the project should be auto-created at application startup, as well as which form should be considered the main form for the application. The main form is automatically created and shown at application startup. The first form in the list of auto-create forms and databases is automatically designated as the main form of the application, but you can select a different form as the main form using the combo box at the top of the page.
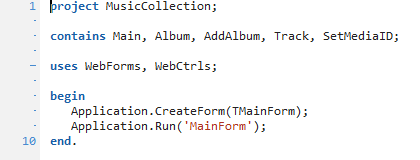
All updates to the main form and/or the auto-create forms and databases list will be reflected in the project source file. The following shows the project source file that corresponds to the auto-create forms and databases list above:
For non-visual client applications, the Startup page is not available.
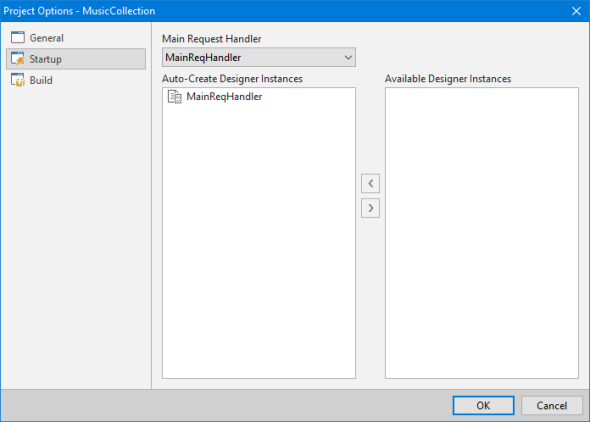
For server applications, the Startup page allows you to specify which request handlers or databases in the project should be auto-created at application startup, as well as which request handler should be considered the main form for the application. The main request handler is automatically created and used as the routing point for the incoming web server request at application startup. The first request handler in the list of auto-create request handlers and databases is automatically designated as the main request handler of the application, but you can select a different request handler as the main request handler using the combo box at the top of the page.
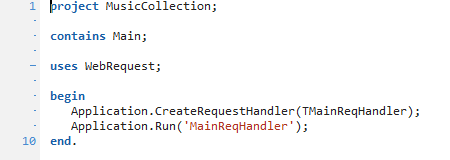
All updates to the main request handler and/or the auto-create request handlers and databases list will be reflected in the project source file. The following shows the project source file that corresponds to the auto-create request handlers and databases list above:
Build (Visual, Non-Visual, and Server)
For visual and non-visual client applications and server applications, the Build page allows you to configure the compilation options for the application.
Visual client applications:
Non-visual client applications:
Server applications:
Please see the Building Applications topic for more information on building projects.
- General application options (title, version number, icon, and whether to show load progress)
- Startup options (auto-created designer instances)
- Build options (hints/warnings, compiler defines, search paths, output paths and file names, output compression, and icon font options)
Use the following steps to modify the project options for a project:
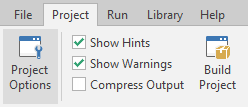
- Click on the Project tab on the main menu.
- Click on the Project Options button on the Project menu.
After making any changes, click on the OK button to save the changes, or the Cancel button to discard the changes.
General Options (Visual Client and Server)
For visual client applications, the General page provides options for specifying the title and version number for the application, the icon to display in the browser window for the application, and whether or not to show load progress.
For non-visual client applications, the General page is not available.
For server applications the General page provides options for specifying the title and version number for the application.
| Option | Description |
| Title | The application title is the descriptive name for the application and, in most modern browsers, will appear in the caption bar of the browser window. This title is accessible to the application source code via the TApplication Title property. |
| Version | The application version is the version number to assign to the application. This version number is accessible to the application source code via the TApplication Version property. |
| Icon | The application icon is a 16x16 or 32x32 Windows icon file that is displayed in the browser window next to the application title. This icon is commonly known as a "favicon" (short for "favorite icon") because the icon is also used to help identify the application in "favorites" or "bookmarks" in the browser. You can type in the file name directly, or use the browse button (...) to select the icon file using a common Windows file dialog. After a valid file name has been specified or selected, a preview of the icon file will be shown in the Preview area. |
| Show load progress | If checked, this option will turn on the load progress dialog for the application. This dialog is shown during application startup. This setting is accessible to the application source code via the TApplication LoadProgress property. |
Startup (Visual Client and Server)
For visual client applications, the Startup page allows you to specify which forms or databases in the project should be auto-created at application startup, as well as which form should be considered the main form for the application. The main form is automatically created and shown at application startup. The first form in the list of auto-create forms and databases is automatically designated as the main form of the application, but you can select a different form as the main form using the combo box at the top of the page.
All updates to the main form and/or the auto-create forms and databases list will be reflected in the project source file. The following shows the project source file that corresponds to the auto-create forms and databases list above:
For non-visual client applications, the Startup page is not available.
For server applications, the Startup page allows you to specify which request handlers or databases in the project should be auto-created at application startup, as well as which request handler should be considered the main form for the application. The main request handler is automatically created and used as the routing point for the incoming web server request at application startup. The first request handler in the list of auto-create request handlers and databases is automatically designated as the main request handler of the application, but you can select a different request handler as the main request handler using the combo box at the top of the page.
All updates to the main request handler and/or the auto-create request handlers and databases list will be reflected in the project source file. The following shows the project source file that corresponds to the auto-create request handlers and databases list above:
| Option | Description |
| Main Form/Request Handler | The main form/request handler is set to the first form/request handler that is designated as auto-create, or blank if no forms/request handlers are designated as auto-create. You can select a different main form/request handler by using this combo box. |
| Auto-Create Designer Instances | The IDE can be configured via the IDE Settings dialog to automatically add any new forms, request handlers, and/or databases created or added to a project to this list. If you don't want a designer instance to be automatically created, you can move the instance to the available list box by dragging and dropping the desired instance into the Available Designer Instances list box. You can select multiple instances to drag and drop by holding down the Ctrl key and selecting the instances using the mouse. |
| Available Designer Instances | This list box shows all forms, request handlers, and/or databases that are part of the project, but aren't marked as auto-create. |
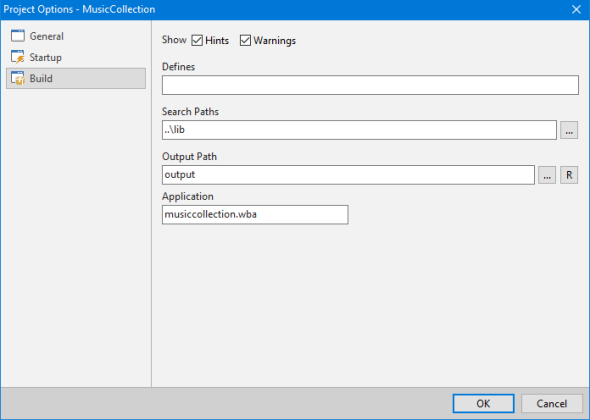
Build (Visual, Non-Visual, and Server)
For visual and non-visual client applications and server applications, the Build page allows you to configure the compilation options for the application.
Visual client applications:
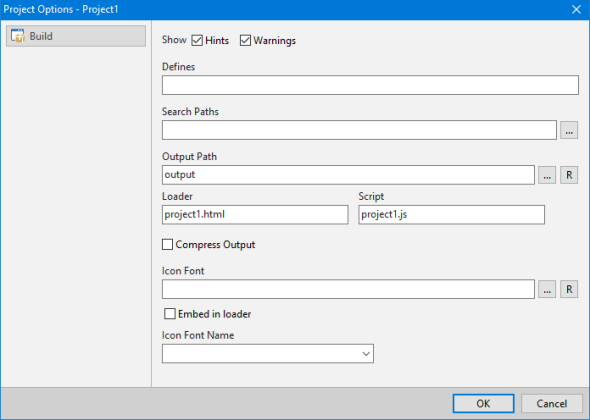
Non-visual client applications:
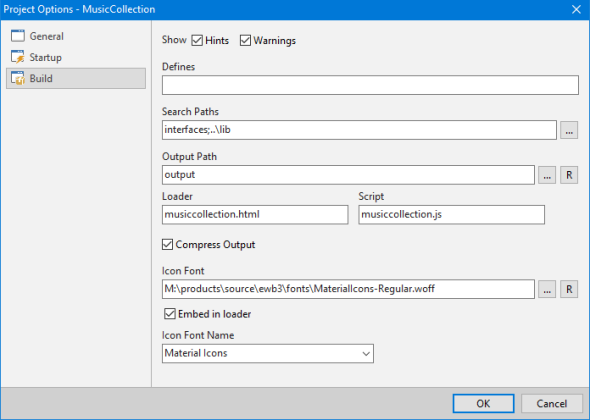
Server applications:
| Option | Description |
| Show Hints/Warnings | Make sure these check boxes are selected (default) in order to see all hints and warnings from the compiler about unused variables and other compilation conditions that you may need to know about. |
| Defines | Enter any compiler defines that you wish to use to control how the source units in the project are compiled. |
| Search Paths | In many cases you will not need to include any additional compilation search paths for a project. By default, the compiler will look in the project source folder and the component library search paths for any contained or referenced units. Please see the Modifying IDE Settings topic for more information on modifying the component library search paths. However, in certain cases you may want to include additional search paths for common library source units or custom control interfaces that are used between multiple projects, and this is where you would do so. When specifying more than one search path, be sure to separate multiple paths with a semicolon (;). Both absolute and relative paths are accepted as search paths. Relative paths should be specified relative to the root project path. |
| Output Path | This path specifies the output path where the application HTML (.html) loader file and application JavaScript (.js) source files will be emitted for client applications, and where the application (.wba) file will be emitted for server applications. This path can be an absolute path or a relative path, and you can click on the relative path (R) button to convert an absolute output path to an output path that is relative to the root project path. |
| Loader | This file name specifies the emitted output name of the application loader file (.html) for client applications. |
| Script | This file name specifies the emitted output name of the application file (.js) for client applications. |
| Application | This file name specifies the emitted output name of the application file (.wba) for server applications. |
| Compressed Output | When this check box is selected, the compiler will emit the HTML and JavaScript files for a client application in a highly-compressed and obfuscated form. This normally can reduce the size of the emitted HTML and JavaScript files by 50% or more. |
| Icon Font | This file name specifies the icon font file to use for the icons in the icon library included in a client application. The icon font file name can use absolute or relative paths, but it is recommended that you use an absolute path in the file name so that there aren't any issues with the compiler finding the icon font file. You can click on the relative path (R) button to convert an absolute icon font file path to an icon font file path that is relative to the root project path. By default, the icon font file is set to the default icon font file EWBIcons located in the \fonts subdirectory under the main installation directory. Please see the Icon Library topic for more information on using icon fonts. |
| Embed in loader | This check box controls whether the specified icon font file name is embedded directly in the HTML loader file created when building a client application, or whether a link to the icon font file name is used instead. By default, the icon font file will be embedded in the HTML loader file. |
| Icon Font Name | This name specifies the font family name to use for the icon font file name when building a client application. |
Please see the Building Applications topic for more information on building projects.
This web page was last updated on Tuesday, September 16, 2025 at 04:56 PM | Privacy Policy © 2026 Elevate Software, Inc. All Rights Reserved Questions or comments ? |
