 | Products |
| Home » Technical Support » Elevate Web Builder Technical Support » Product Manuals » Elevate Web Builder 3 Manual » Using the IDE » Deploying a Project |
When a project is deployed, the IDE performs the following steps:
- The IDE authenticates against the target deployment server specified for the project. The default deployment server is the Internal web server built into the IDE. Please see the Using the Server Manager topic for more information on specifying the user ID to use for server management and deployment.
- The IDE starts to deploy the contents of the project's output path to the target deployment path on the deployment server. The target deployment path is a combination of a special base resource name followed by the deployment path specified for the project:
<Resource Name>/<Project Deployment Path>
For client applications, the output files are uploaded to the Content resource on the deployment server. For server applications, these files are deployed to the Applications resource on the deployment server. Please see the Configuring the Web Server topic for more information on how these resources are defined on the deployment server.
 If any part of the deployment path doesn't exist, it will automatically be created. If the user account ID used for the deployment does not have the proper privileges for creating folders on the deployment server, then the deployment will fail with a privileges error. Please see the Using the Server Manager topic for more information on specifying the user ID to use for server management and deployment.
 - As each project output file is uploaded to the deployment server, the IDE first checks to see if the file already exists in the deployment path. If the file already exists and hasn't been modified, then the file upload is skipped for that file. This saves a lot of time when some of the project output files are large external files being included with the project. Please see the Using the Project Manager topic for more information on including external files with a project.
The last compiled version of a project application will be uploaded to the deployment when a project is deployed. It is always wise to make sure to build the project before deploying in order to ensure that the most recent version of the application is uploaded.
- Click on the Project tab on the main menu.
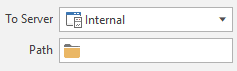
- Select the deployment server from the list of available servers and modify the deployment path as necessary.
- Click on the Deploy Project button on the Project menu to deploy the current project. During deployment, information about each application file being copied will appear in the Messages area at the bottom of the IDE. In addition, a progress dialog will be displayed in the status bar that shows the total progress of each file upload.

You can also use the keyboard to deploy an application by holding down the Alt key and pressing the F9 key.
This web page was last updated on Tuesday, September 16, 2025 at 04:56 PM | Privacy Policy © 2026 Elevate Software, Inc. All Rights Reserved Questions or comments ? |
